CASE NOTES
How to use a cipher wheel (with a free Day 1 puzzle)
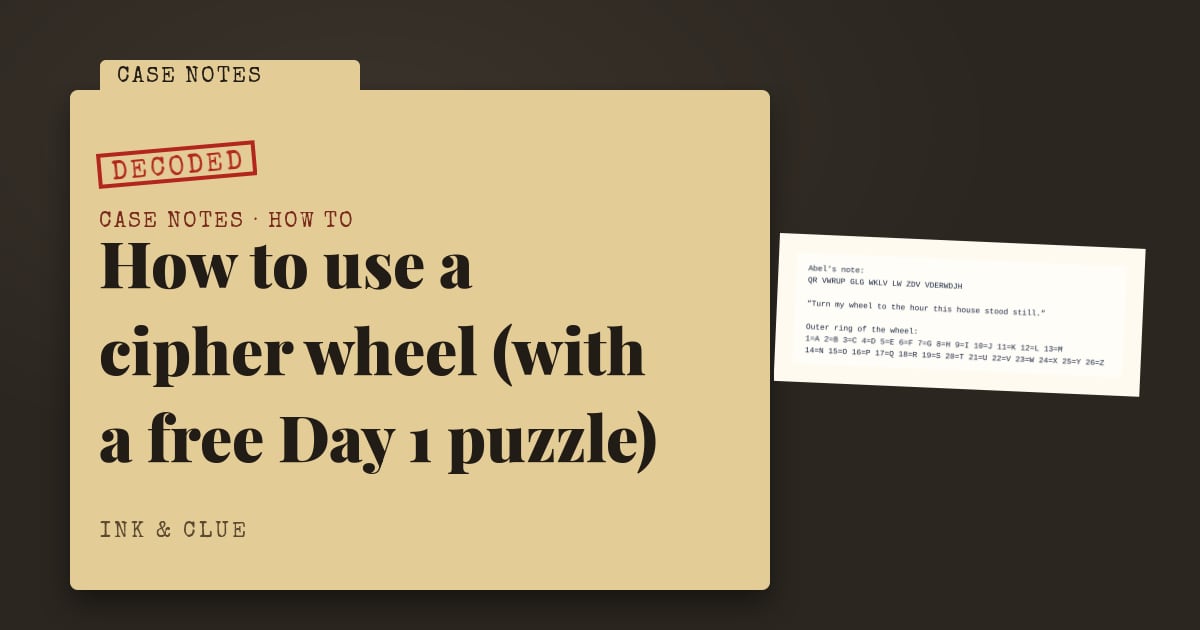
A cipher wheel looks like a toy, but it is one of the oldest code tools there is. Two discs, two alphabets, one turn. Once you understand that single turn, a whole family of puzzles opens up — including the first lock in our December case.
This guide walks through how a cipher wheel works, how to set it, how to decode a message, and the mistakes almost everyone makes the first time. At the end there is a free puzzle so you can try it straight away.
What a cipher wheel is
A cipher wheel has two rings of letters, one inside the other. Both rings carry the same 26 letters in the same order. The outer ring stays still. The inner ring turns.
When the two rings line up A-under-A, every letter sits under itself and nothing is hidden. Turn the inner ring a few steps and every letter now sits under a different one. That shift is the whole secret. A message written with the wheel turned three steps is still perfectly readable — if you know to turn it back three steps.
This kind of code is called a shift cipher, or a Caesar cipher. It is simple on purpose. In a puzzle book, the challenge isn’t the arithmetic. It’s working out how far the wheel was turned.
The key: how far to turn
Every shift cipher has a key: the number of steps, or the letter that A lines up with. Puzzle writers almost never hand you the key directly. Instead they hide it in the scene:
- a number written somewhere (“the third drawer”, “room 7”);
- a time or a date;
- a letter that is circled, underlined or printed in a different colour;
- an instruction like “set the wheel to…”, followed by something you have to find.
When a puzzle gives you a wheel and a coded note, look for the key outside the note first. The note is the lock; the key is usually lying elsewhere in the room.
Decoding, step by step
Here is the method we use on every cipher wheel puzzle. It works with a printed wheel, a paper cut-out, or just two alphabets written one above the other.
- Write out both alphabets. If you don’t have a wheel, write A to Z on one line, and A to Z again on a strip of paper you can slide underneath.
- Find the key and set the wheel. Say the key tells you that inner A goes under outer D. Slide the strip until A sits under D.
- Decide which ring is the code. Read the puzzle carefully: are you looking up the coded letters on the inner ring or the outer ring? This is the step people get backwards.
- Decode one word, not the whole note. Take the shortest word in the message. A two- or three-letter word that decodes to something real (IT, THE, WAS) tells you the setting is right.
- Then do the rest. Work letter by letter and write each one down as you go. Don’t try to hold it in your head.
A small example
Let’s encode the word LAMP with a shift of three. Every letter moves three steps forward: L becomes O, A becomes D, M becomes P, P becomes S. The coded word is ODPS.
To decode, go the other way: O back three steps is L, D back three is A, and so on. You get LAMP again. Notice that the same key gives you the answer in both directions — you only need to remember which direction you are going.
The three mistakes everyone makes
Turning the wrong way. If your first word comes out as nonsense, try the same number of steps in the other direction before you change anything else.
Off by one. “Turn it to four” can mean four steps, or “line A up with the fourth letter”, which is D — that’s only three steps away from A. When a puzzle gives a number, check both readings on your shortest word.
Decoding everything at once. If the setting is wrong, you’ve wasted ten minutes. One short word first, always.
If you are completely stuck, there are only 25 possible shifts. Try them one at a time on your shortest word. It’s slow, but it always works — and a fair puzzle should never need it, because the key should be findable in the scene.
Why a cipher wheel makes a fair puzzle
We like cipher wheels because they reward attention, not guesswork. Once you’ve found the key, the answer can only come out one way. There is no “close enough”. Either the message reads as plain English or it doesn’t. That’s exactly the kind of puzzle we want in a mystery: you can check your own work before you write the answer down.
It’s also why we write the key into the story instead of next to the note. The puzzle isn’t really “can you shift letters” — it’s “did you notice the detail that tells you how far”. If you’d like to know how we check that every key is actually findable, read our fair-play rules.
Try it: Day 1 of the December case
The first door of our escape room advent calendar is a cipher wheel puzzle. A lighthouse keeper has left a note in letters that make no sense, with one plain line underneath telling you how to set his wheel. The setting is hidden in the scene around you — read the story carefully.
You don’t need to print anything. The note and the wheel are on the puzzle page, and if you get stuck there are two sealed hints. Open the first one only if you need it.
When you’ve decoded the note, the last word is the answer. Keep it — in the book, early answers come back later in the case.
Play it on the Frostmere case page, or open the puzzle directly from the card below.
MORE CASE NOTES
What makes a mystery puzzle fair-play: 4 rules we test every book against
Fair-play means you could have solved it from what you were shown. Here are the four rules we hold every Ink & Clue case to, and how we check them.
Escape room advent calendar for adults: how a day-by-day puzzle mystery works
An escape room advent calendar turns December into one long case: a door a day, a code behind each one. Here is how it works and how to get the most out of it.